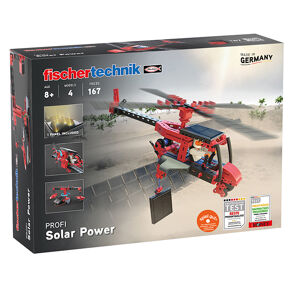
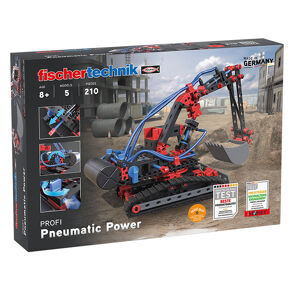
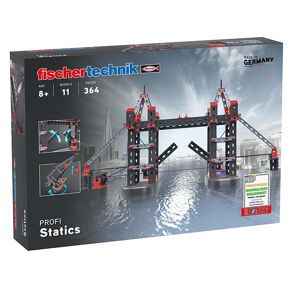
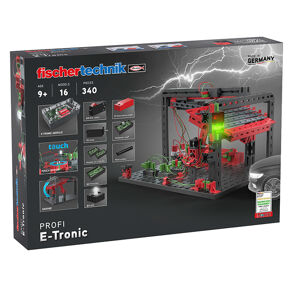
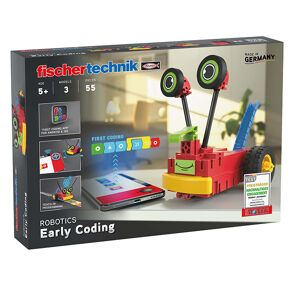
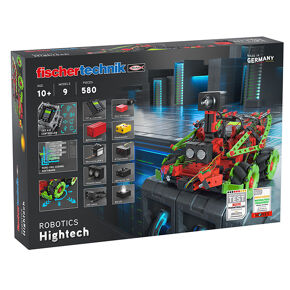
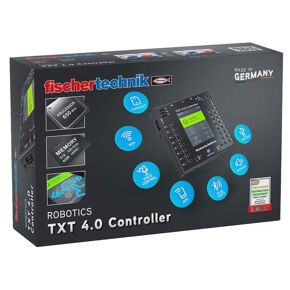
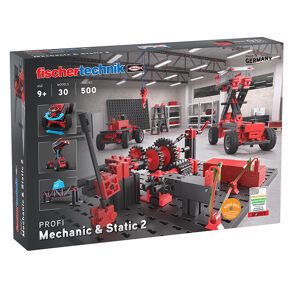
ROBOTICS TXT Smart Home

For communication with the fischertechnik Cloud, the TXT Controller requires firmware version 4.7.0.

For older versions, an update must be carried out.
Smart homes and digitalisation are bang on trend at the moment and you can now explore this topic in a fun way with the new fischertechnik ROBOTICS TXT Smart Home construction kit. The accompanying educational material assists you with background information, assignments and programming tips. We hope you have a lot of fun experimenting with the ROBOTICS TXT Smart Home.

ROBOTICS TXT Smart Home

More information on the product
To the product page

ROBOPro Update 4.7.0

To control the models of this construction kit, the ROBOPro 4.7.0 software or higher is required
Download here for free

fischertechnik Cloud

Link models with the Cloud
Click here to access the fischertechnik Cloud

First steps:

• Download the ROBOPro 4.7.0 software update or higher and install on your computer.

• Activate the TXT Controller and connect it to your PC via USB.

• Open ROBOPro, set the correct interface for the TXT Controller using the COM/USB button and then open the test window.

• Now an operating system update will be carried out on the TXT Controller. Warning: Do not interrupt the power supply to the TXT Controller during the update!

• To build the models, use the printed building instructions in the construction kit. Instructions for pro-gramming and controlling the models can be found in the accompanying educational material located here on the e-learning portal. Have fun!

Working with the fischertechnik Cloud:


1. Go to www.fischertechnik-cloud.com and create a personal account for the fischertechnik Cloud. To do this, go to the registration window by clicking “Register” and enter the information required. If you are under the age of 18, your parents’ email address must be given. Access to the Cloud can only be granted with their permission.

2. Your TXT must have an operating system in version 4.7.0 or higher. You can only connect the TXT Controller to the fischertechnik Cloud if you have this version. (See menu TXT – Settings – Info).

3. Select “Cloud Client” under Properties on the TXT.

4. Connect the TXT to a Wi-Fi network as a wireless device. (Settings – Network – Wi-Fi settings – Wi-Fi mode) Recommendation: Set to DHCP.

5. Connect the TXT to the fischertechnik Cloud: Settings – Network – Cloud settings – New pairing. If the Controller can establish a connection with the Cloud, a QR code and a pairing code will appear. You now have 30 minutes to add the TXT to your account in the Cloud. You can scan the QR code, with the app Quick Scan, for example, and you will be automatically forwarded to the fischertechnik Cloud. Alternatively, you can go to the fischertechnik website and go to Settings – Add Controller, give the TXT Controller any name you like and manually enter the pairing code.

6. Now the TXT Controller is connected with the Cloud. You can download the TXTSmartHome applica-tion onto the Controller under File – Cloud and start it. This allows you to control the Sensorstation model over the Cloud, similar to with the ROBOPro programme before. However, you are no longer limited in terms of location, you can now control the model from anywhere in the world using a smartphone, tablet or PC which can access the fischertechnik Cloud over the Internet. You can dis-play the sensor values on the so-called Dashboard, see the camera image and control the camera with the direction buttons. This means that you will always know what is happening in the area around the Sensor Station. Have fun!

The following functions are available in the fischertechnik Cloud:

Display window on the Dashboard for the measurements regarding temperature, humidity, air pressure, air quality, brightness, camera image, camera control, gallery for snapshots which can be taken by the camera. The individual windows can be added using the red + button on the bottom right of the screen. In the menu of each window, you can switch between displaying the values for the sensors individually or in a curve. The sensor values can be exported to a .csv file. The individual windows can be moved as you wish and you can change the order in which they are displayed. Each window can be maximised so that it can be seen in full screen mode. The images from the gallery can be downloaded, either one at a time or all together. Images can also be deleted.
Camera control:
You can control both axes of the camera individually. The step size can be set. The red dot in the middle of the camera control shows the position of the camera within the available pivot range.
In Profile (menu at the top right), you can change the password and also completely delete the profile. Several TXT Controllers can be assigned to each profile. For each TXT Controller, it can be set whether an email or browser notification is sent for the following alerts sent by the Controller:
Movement in the camera image Temperature under 4°C (Frost monitor)
Humidity over 80% (Damp monitor)
You can select the preferred language in the menu on the Dashboard.
sc93-delivery-1